Is your WordPress site and admin dashboard running slower than you expected it to? If this is an issue you’re facing, you’ll want to consider different solutions to help optimize your experience and improve overall performance. In this article, we’ll teach you about different ways you can improve your WordPress site and admin dashboard’s optimization.
Test WordPress Site and Dashboard Performance
Before changing anything about your site or admin dashboard page, you should measure your WordPress site and admin dashboard’s speed so you can compare and identify any future improvements to your site’s performance. Thankfully, this can be done relatively easily thanks to desktop browsers having built-in tools that check site performance. For example, if you’re using Google Chrome, you can simply right-click anywhere on the page to open the Inspect tool on your site. From here, find the “Lighthouse” tab in the new interface that appears, and click the “Generate Report” button below the Lighthouse image. This lets you generate a report where you can see what your WordPress site and admin dashboard is being slowed down by. You can then use this information to guide your next steps in improving performance based on your individual needs.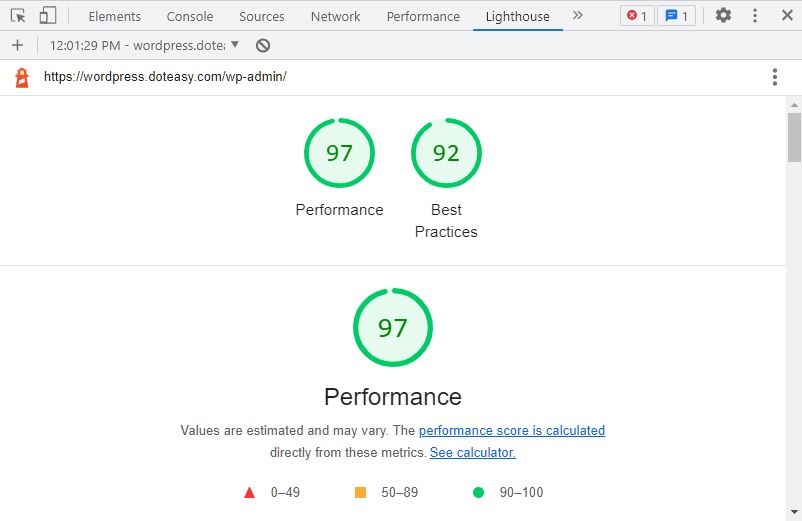
Install WordPress Updates
49.07% of WordPress sites aren’t running the latest version of WordPress, and 33.58% of WordPress sites are at least 2 updates behind the latest version. While many people may not keep their WordPress sites up to date with the newest version, there are notable benefits to their site’s performance that they’re missing out on. WordPress updates can include optimization updates to WordPress’s features and coding, speed and security improvements, bug fixes, and more. This means you can improve your site’s overall performance simply by adapting this newer version. To install WordPress updates, simply enter the “Updates” page under the “Dashboard” tab in your WordPress dashboard menu, then install any updates you see. The same process is used for WordPress plugin and theme updates.Delete Inactive Plugins
It’s common for WordPress sites to have a lot of plugins installed on them. While many may be installed, a good portion of these plugins might be inactivated, meaning they’re turned off but are still installed on the site. It’s best practice to delete these unused plugins to improve your site’s performance. Even if plugins are inactive and disabled, they still take up resources and memory on your site, which can slow down your site’s performance. The solution to this is to simply delete your unused plugins to maximize more available resources going to other parts of your site that matter. Enter the “Installed Plugins” page under the “Plugins” tab in your WordPress admin dashboard menu. You can only delete inactivated plugins, so under any active plugins you’d like to delete, click the “Deactivate” option to do so. Then, under any inactivated plugins, simply click the “Delete” option below the plugin’s name. WordPress will ask you for confirmation for this deletion, so click the “OK” option to proceed, and the plugin will be safely removed and uninstalled from your site. Unused but not-deleted plugins can also be potential security liabilities. Loopholes and weaknesses in their code could mean danger against the safety of your site. Be sure to delete unused plugins, not just to improve site performance, but also to ensure safer site security.Update Your PHP Version
WordPress runs on a programming language known as PHP. When PHP is updated, its functions and performance improve, and as a result WordPress sites also benefit from these alterations once their version of PHP is updated. Using the latest version of PHP means your site receives significantly improved performance, and not updating means you’re missing out on performance improvements. If you’d like to check your current PHP version, click “Site Health” under the “Tools” tab in your admin dashboard menu. Click into the “Info” tab, and look for “PHP version” in the “Server” section. If you need to update your version, it’s relatively straightforward to update your PHP version. The specific steps vary depending on your web hosting provider, but in general, you may enter your hosting control panel, which could be something like cPanel, and look for an option indicating itself to be something like a PHP Manager or PHP Management System. From here, you’ll be able to select the PHP version you’d like your site to run on.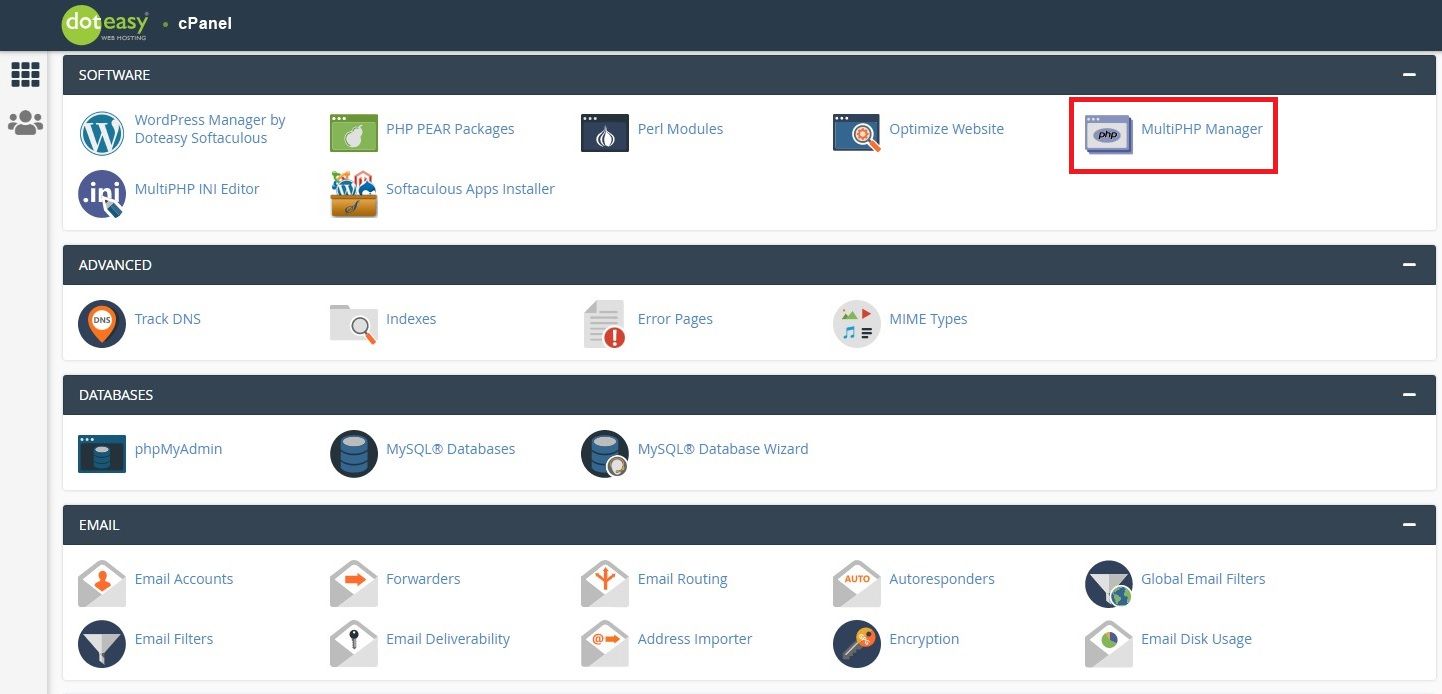
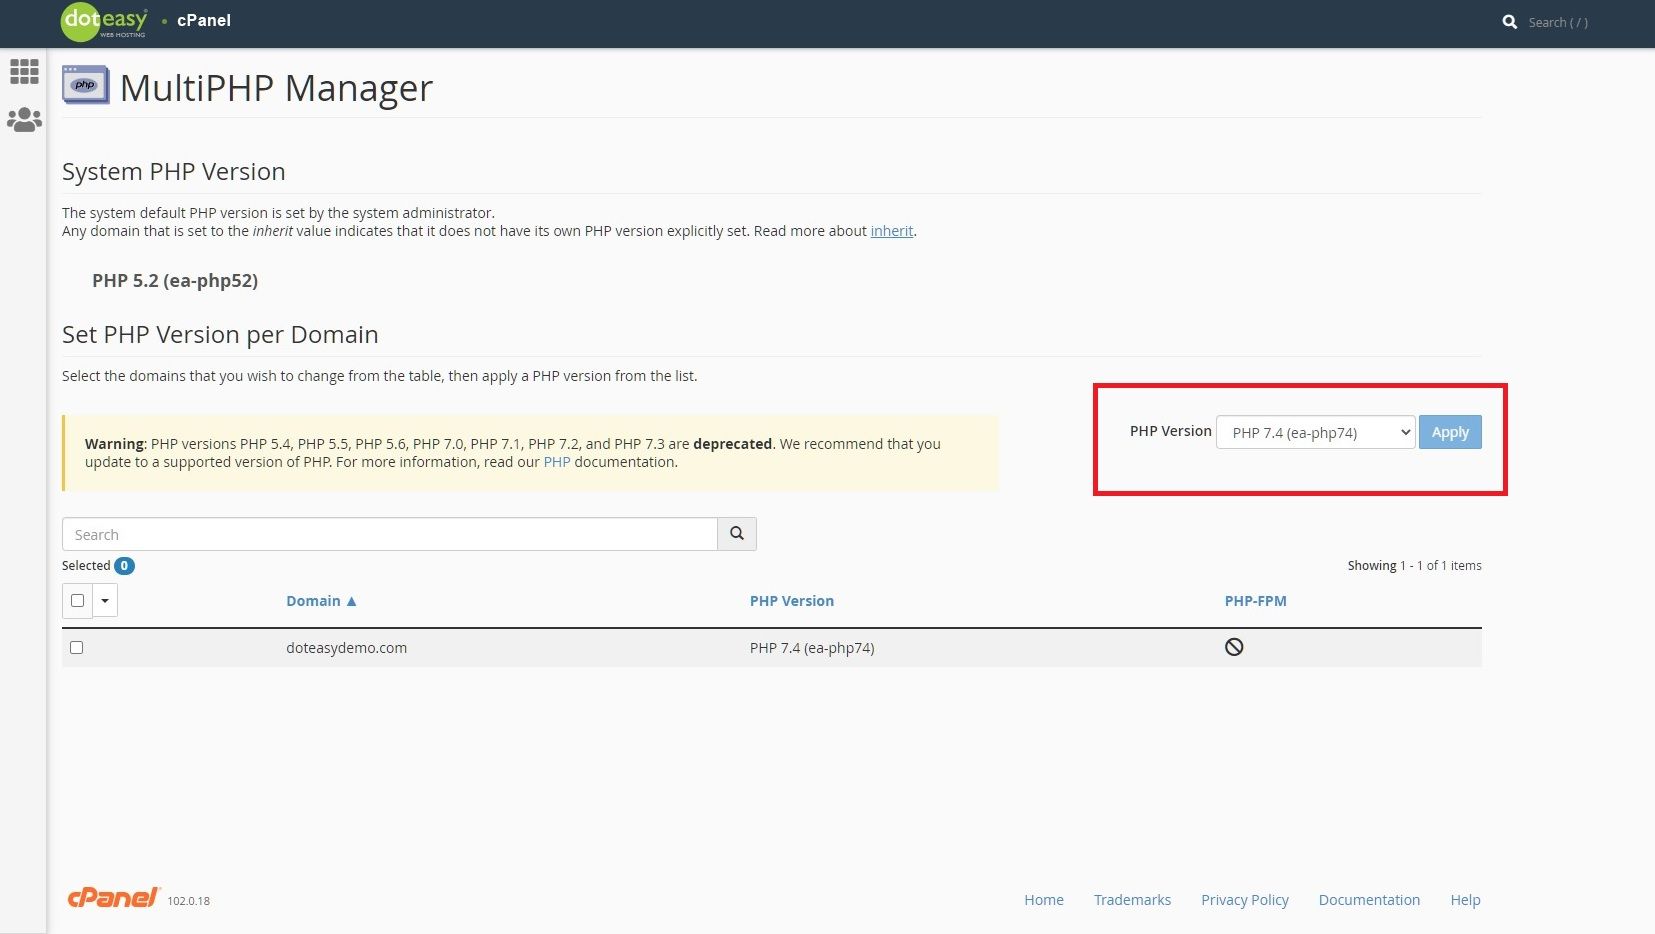 It’s important to note that some WordPress themes or plugins with longer histories of operation might not be compatible with newer PHP versions due to their creators not having updated them to be compatible yet. Incompatibility between updated PHP versions and themes or plugins can be worked around by lowering your site’s PHP version so that both PHP and the themes or plugins in question are compatible.
 Increase Your PHP Memory Limit
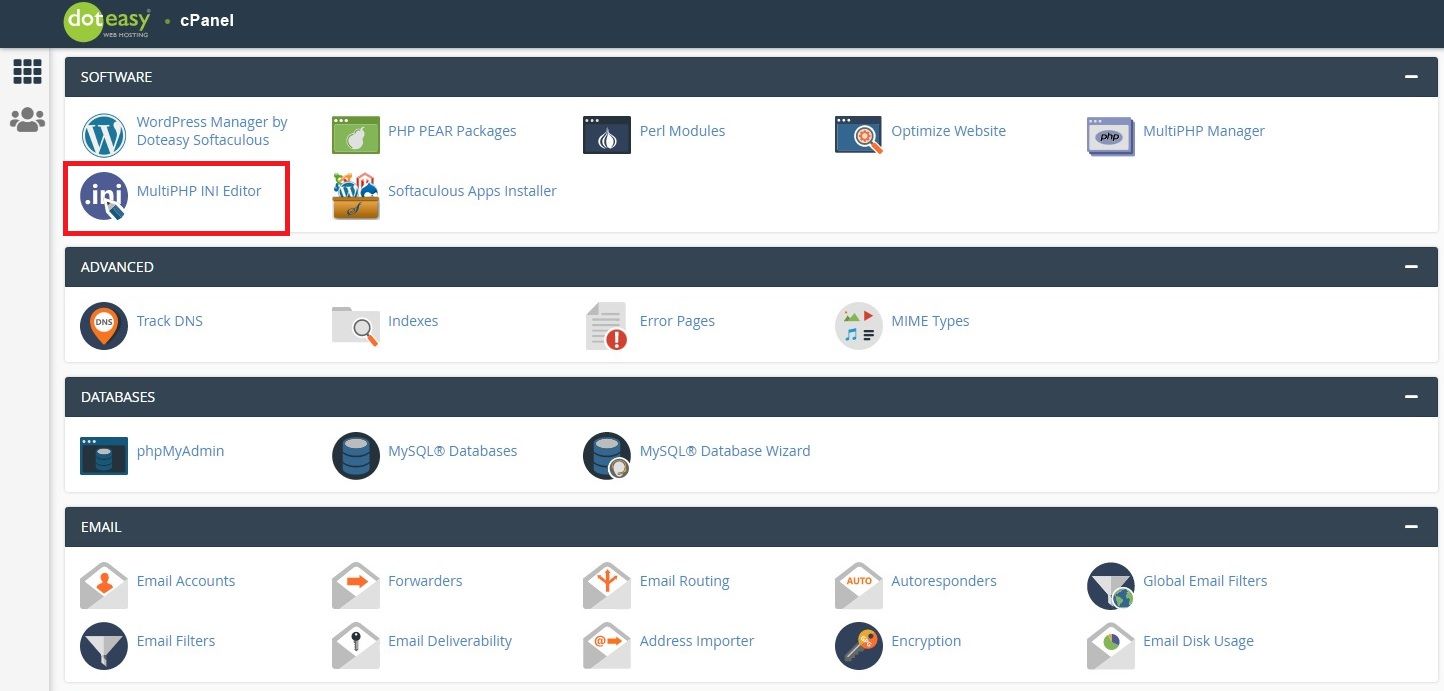
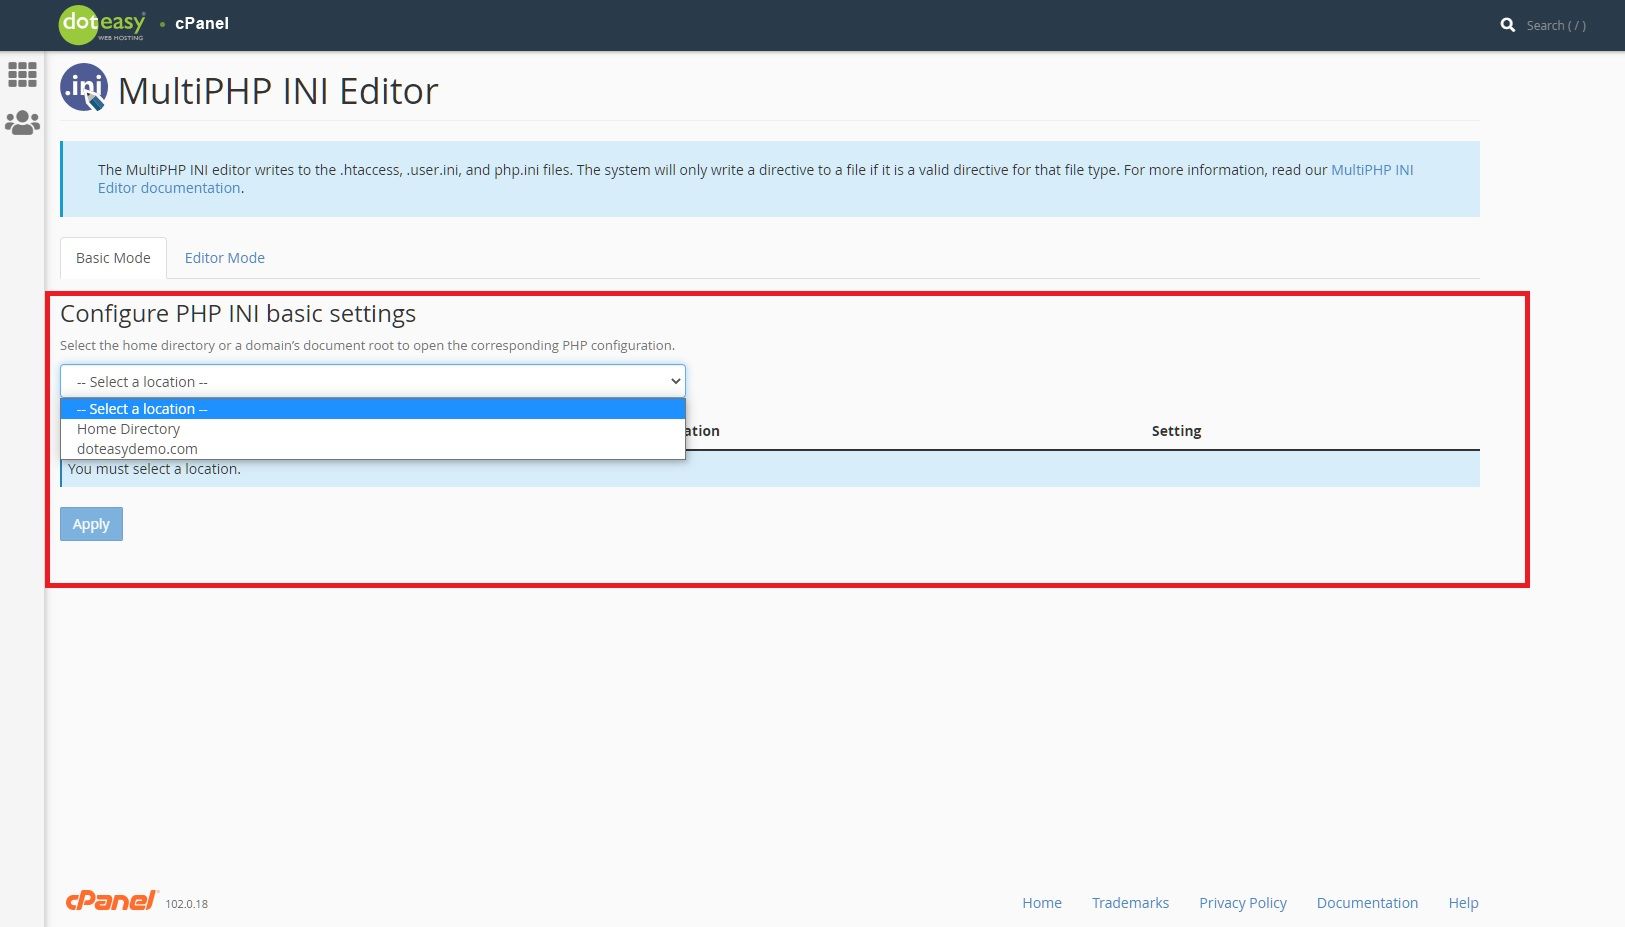
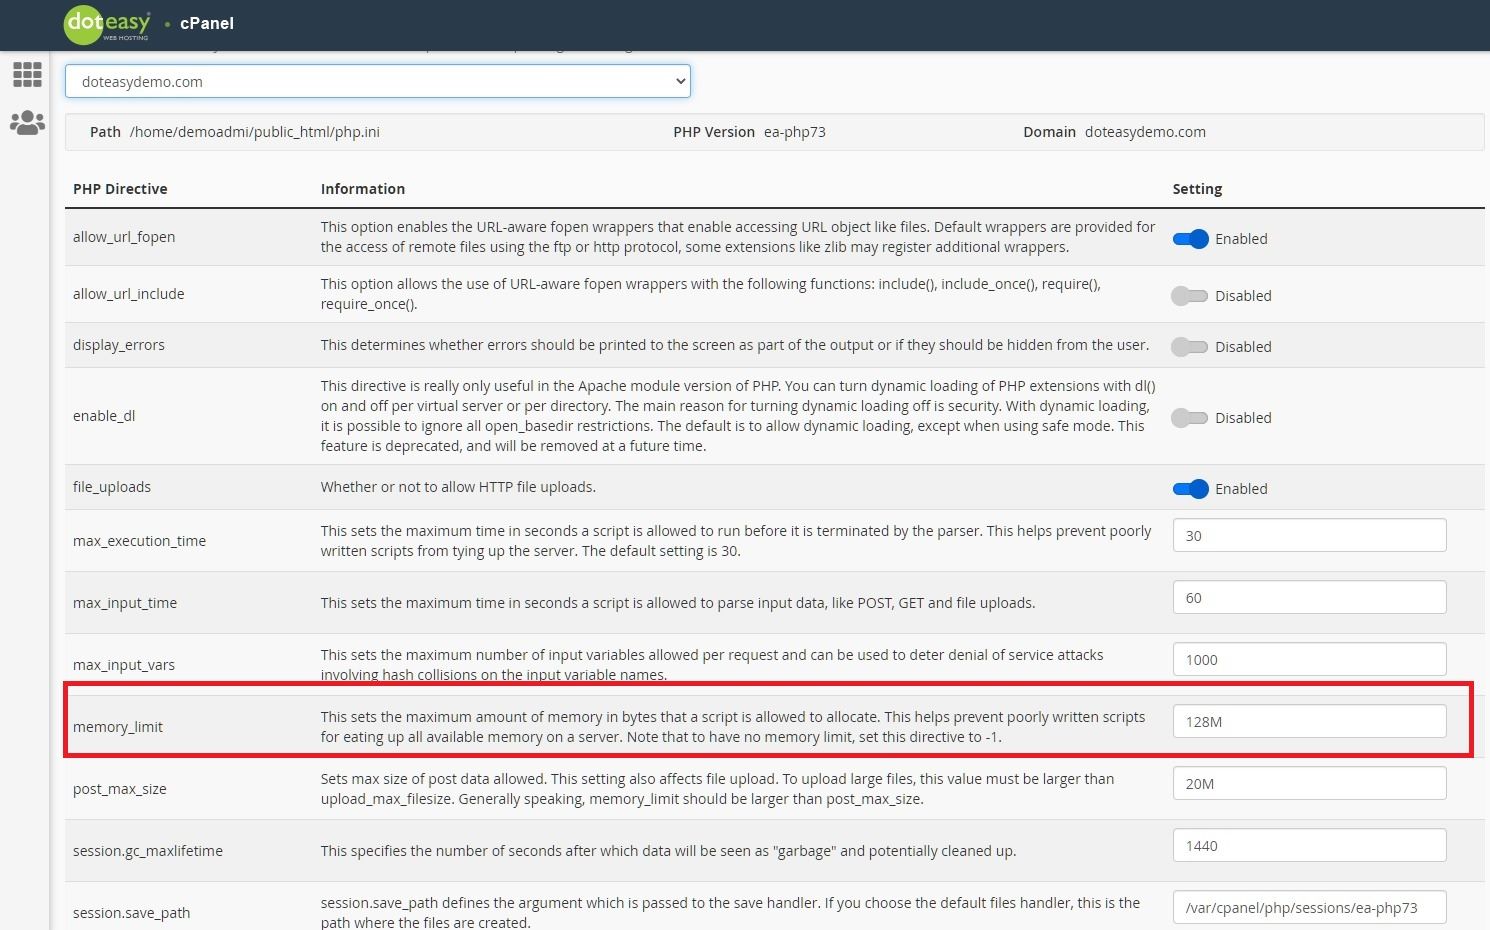
Your site needs memory to smoothly operate itself and all its associated plugins and features simultaneously. If you don’t have enough memory available for PHP and WordPress to operate with, it might slow down and even crash your entire site. Often, more data-heavy sites like those with long pieces of writing, many images, active forms, or process-heavy plugins, all of which use lots of data, have a need for more memory than typical sites do. The good news is that there’s typically more than enough memory allocated to sites’ functioning. To see your PHP memory limit for yourself with WordPress, start by finding the “Tools” tab in your admin dashboard menu and clicking on “Site Health”. From there, enter the “Info” tab and look for “PHP memory limit” under the “Server” section. For a typical site, a memory limit of 128MB is more than sufficient and will support the site’s functions with little to no issue. With Doteasy, your PHP memory options can be found by entering your cPanel interface once you’ve logged in. Find and click into the “MultiPHP INI Editor” page. From here, choose the domain that you want to edit the PHP configuration for. You’ll then be able to directly tweak your memory limit based on your site’s needs.