Setting up Domain Rules
Just as the Doteasy Email Protection system allows you to make action rules based on the sender's email address, you can also make action rules based on just the domain part of an email address.
- Log in to your Doteasy Email Protection system dashboard if you haven't already done so.
- Click on Rules from the top menu and select Domains.
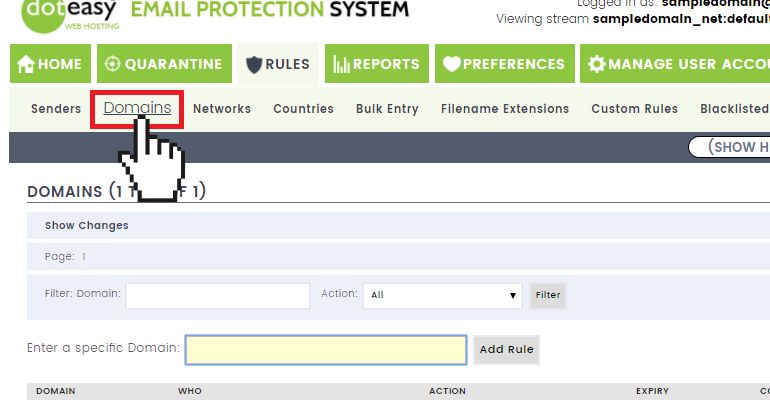
- On the Domains rule page, enter the domain name in the Enter a specific Domain field.
- After you've entered the domain name, click Add Rule.
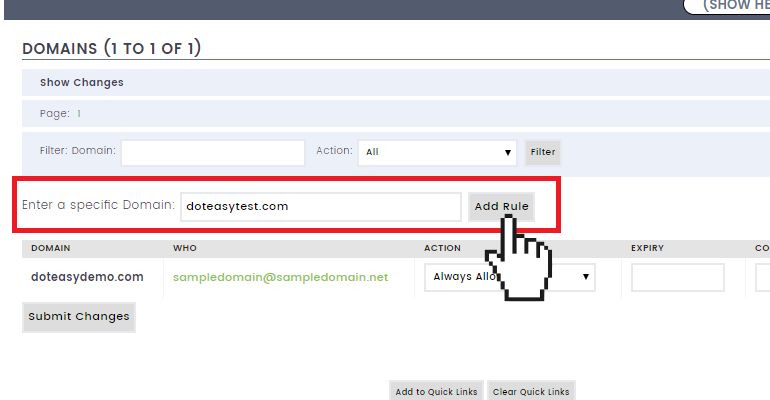
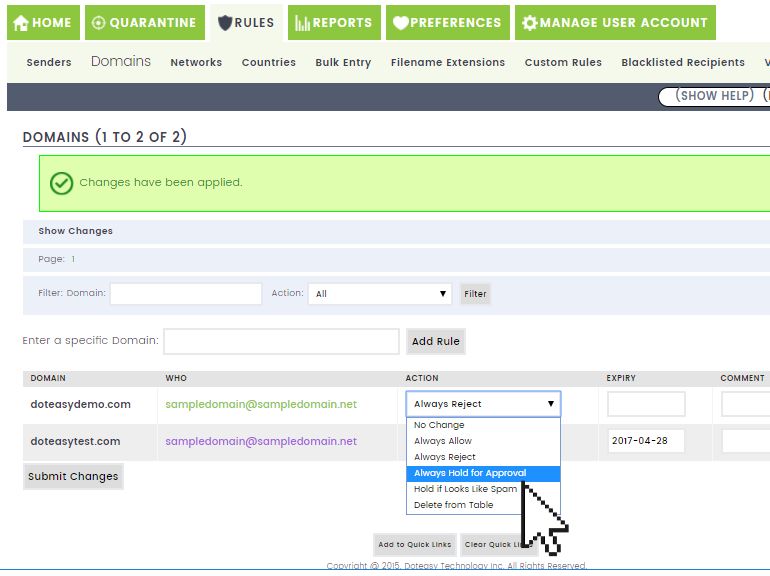
- On the next page, select the desired action to be taken when an email is received from the specified domain name:
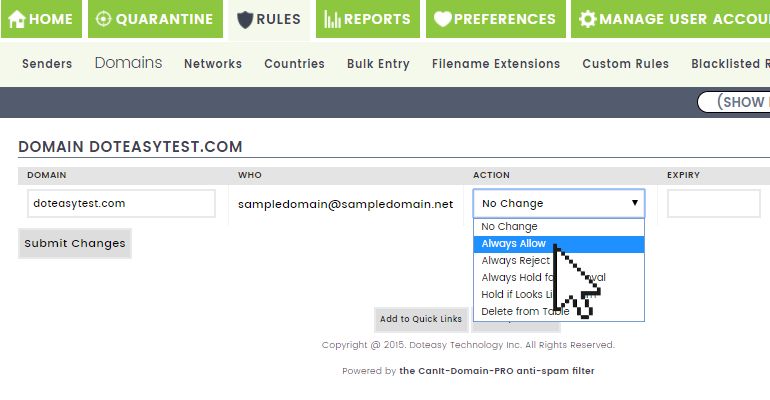
- No Change – keep the current action
- Always Allow – always allow mail from this domain name without scanning for spam
- Always Reject – email from this domain name is always rejected with a permanent failure code
- Always Hold for Approval – email from this domain name is always held for approval, even if spam-scanning does not flag it as spam.
- Hold if Looks Like Spam – email from this domain will be held if it scores high enough on the spam scale
- Delete from Table – the domain is deleted from the table
- The Expiry field allows you to set an expiry date for the action rule. If you want to the rule to remain permeant, simply leave the Expiry field blank. If you want the rule to stop after a specific date, enter the date in the format YYYY-MM-DD or use the date selector to choose the rule's expiry date.
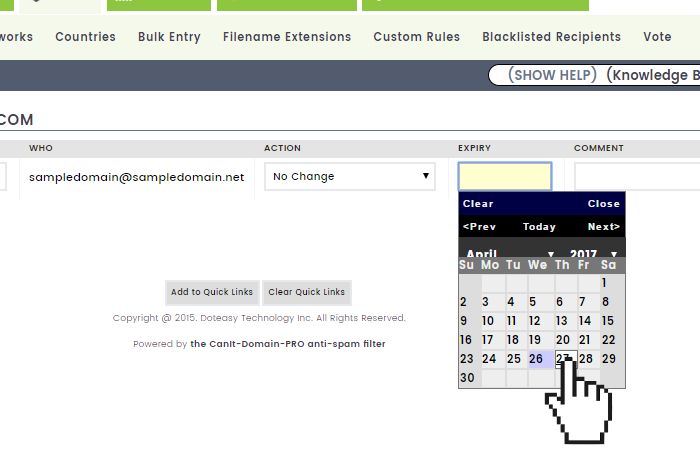
- If you wish, enter a comment in the Comment field. You can use this as a reminder why you allowed or blocked a domain name.
- When ready, click Submit Changes.
Once you have submitted the Domains rule, it will be added to your Doteasy Email Protection system's Rules > Domains page. You can edit any existing rules you have created (make sure to click Submit Changes after to complete the change request).
How Domain Rules work
Let's look at an example to better understand how Domain rules work. Suppose you receive an email from user@mail.sub.domain.com. The Doteasy Email Protection System will examine the domain name part of the email address, in other words, everything after the @ sign. So, in this example, a domain lookup will be performed for:
- mail.sub.domain.com
- .sub.domain.com
- .domain.com
- .com
If you have set up a Domains rule against .domain.com the Doteasy Email Protection system will automatically carry out the action you have specified in the rule.
NOTE: A Domains rule against .domain.com is different from a rule against domain.com.
For example, a domain rule of example.com applies only to example.com itself. On the other hand, a domain rule of .example.com will be applied to any subdomain of example.com (of course, unless there is a more specific rule for a specific subdomain).
So, if you create a domain rule to block email from .domain.com, you will also automatically block spam.domain.com, legit.domain.com and sub.domain.com. If you want to allow email from sub.domain.com, you can explicitly create an Always Allow action rule for sub.domain.com. The more components you have set as a criterion, the more specific the rule and the higher the priority (ie. take preference over other rules with fewer components). In other words, a Domains rule of mail.sub.domain.com will always have higher priority over .domain.com.
