Adding an email auto-responder from Doteasy admin panel
If you are the administrator of the web hosting account, you can customize the email auto-responder settings from your Doteasy account admin panel.
-
Log into your Doteasy Member Zone
-
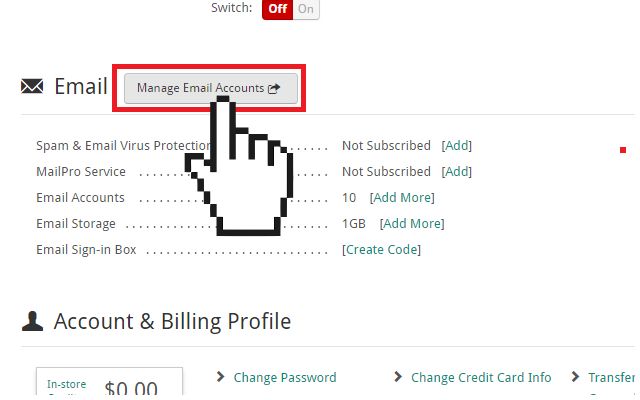
In the Email section, click on Manage Email Accounts.
If you are on the cPanel mail platform:
You will be redirected to your account cPanel dashboard.
-
In the Email section, click on Autoresponders.
-
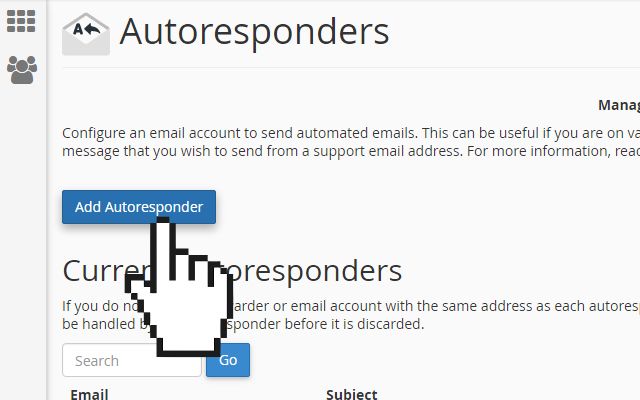
On the Autoresponders page, click Add Autoresponder to create an email auto-responder.
-
Fill in the fields to create your auto-responder. Ensure you fill in details like character set, interval, email, from, subject, whether to include HTML, body of the message, and start and stop times.
-
When ready, click Create/Modify to complete the process.
If you are on the SmarterMail platform:
Unfortunately, you will not be able to create auto-responders for your domain user accounts from your SmarterMail admin account. To create an auto-responder for an email address, you will need to do so through that email address’s webmail interface.
-
Customizing email forwarding settings from the webmail dashboard
Email forwarding settings can also be customized from the email account’s webmail dashboard.
-
Go to the Doteasy homepage and click on Web Mail Login.

-
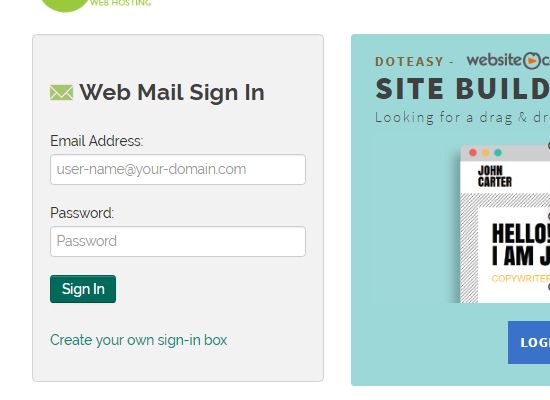
Log into webmail using the email address and password of the account you want to edit email auto-responder settings.
If you are on the cPanel mail platform:
You will be logged into your preferred webmail application (RoundCube or Horde).
-
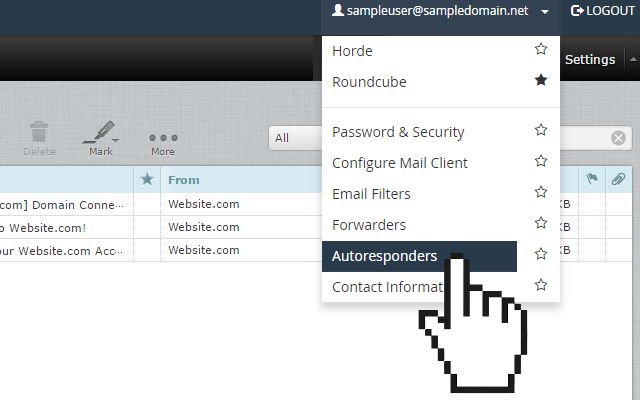
Click on the top username drop-down menu and select Autoresponders.
-
On the Autoresponders page, click Add Autoresponder to create an email auto-responder.
-
Fill in the fields to create your auto-responder, following similar steps as described above.
-
When ready, click Create/Modify to complete the process.
If you are on the SmarterMail platform:
You will be logged into your SmarterMail webmail dashboard.
-
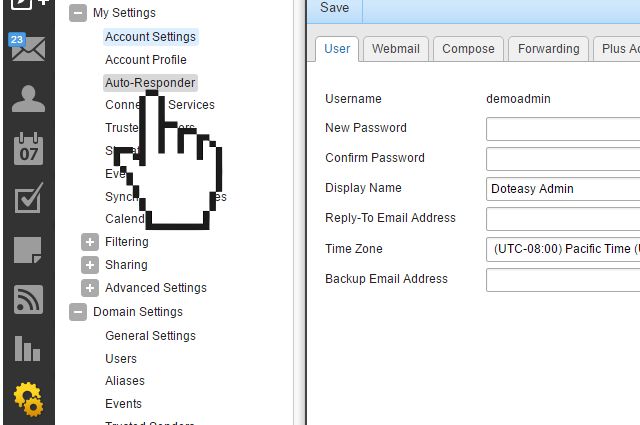
Click on Settings on the side menu and under My Settings, select Auto-Responder.
-
Click on the Options tab and check the Enable auto-responder option.
-
Click on the Message tab and fill in the fields to create your auto-responder, specifying subject, compose format, start and end dates, and the body of the message.
-
When ready, click Save to complete the process.
-
